Hello again!
This time I’d like to share my journey with installing a Mysterium (MYST) node on the first gen RPi Zero.
First of all, I think I should mention that according to the official docs, running a node on an original, first-gen Pi Zero is not supported.
The official binaries are built for ARMv7 and ARM64. The original Pi Zero runs on an older ARMv6 architecture. If you try to run the standard installer, the Pi will spit out an “Illegal Instruction” error. Zero only has a single-core 1GHz CPU and 512MB of RAM, which is below the officially stated 1GB minimum.
Knowing all that and having a spare Pi Zero V1.3 sitting in a drawer, I decided to try my luck in getting it to run anyway, mainly for fun. My first tries were actually with Honeygain, but that proved to be more difficult due to stricter connection requirements and overall system demands.
Step 1: The cross-compile
Compiling the binary on the Pi is probably possible, but due to the limited resources, it would take a lot of time. To save time I suggest doing this on a different Linux PC or in WSL.
- Install Go (Golang) on your PC.
- Clone the Mysterium node repository:
git clone https://github.com/mysteriumnetwork/node.git cd node - Tell the Go compiler to target the ARMv6 architecture.
env GOOS=linux GOARCH=arm GOARM=6 go build -o myst ./cmd/myst
Pre-built binary
Alternatively, if you don’t want to compile the binary yourself, you can download the one I compiled here.
You should now have a custom-built Mysterium binary that won’t instantly crash your Pi.
Step 2: Preparing Raspbian
Since the Pi Zero has 512MB of RAM, and Mysterium tries to do a heavy WireGuard encryption handshake, the Linux out of memory killer will kill the process sooner or later.
I suggest using the CLI version (no desktop) version of Raspbian, but it should work in the desktop one too. YMMV.
- Install the necessary networking tools:
sudo apt update && sudo apt install -y wireguard iptables ca-certificates - Increase the swap file to 2GB. Theoretically you don’t need that much, but your Pi will thank you if you intend on using it for anything else than the node.
sudo dphys-swapfile swapoff
sudo nano /etc/dphys-swapfile
Change CONF_SWAPSIZE=100 to CONF_SWAPSIZE=2048.
sudo dphys-swapfile setup
sudo dphys-swapfile swapon
Step 3: Deployment
Connect the SD card to your PC or use scp to copy your compiled myst file to the Pi Zero (e.g. into /home/pi/).
Make it executable and run it for the first time:
chmod +x ./myst
sudo ./myst service --agreed-terms-and-conditions
(Run with sudo so it can create the VPN network interfaces).
Open a browser on your main PC and navigate to http://<YOUR_PI_IP>:4449 to claim your node.
Step 4: Set up the node
This is where you may question your life choices. You will likely see “Monitoring Failed” and if you click “Test Node” in the Myst dashboard UI, you will get an “Internal Server Error”.
Here are the golden rules for a Pi Zero node I found while getting mine to work:
1. Forward your UDP ports
The Pi Zero is too weak to handle standard NAT hole-punching reliably. You must manually port forward on your router.
- Forward UDP ports
56000-56100to your Pi’s static IP. - In the Mysterium Node UI Settings (Advanced), set the UDP port range to
56000-56100.
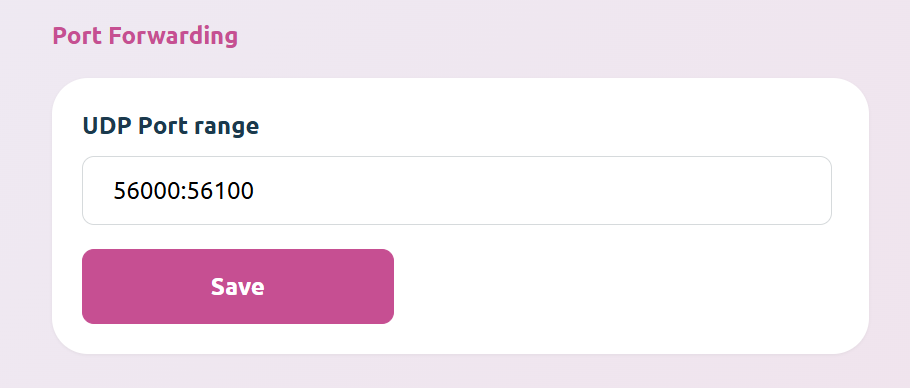 Figure 1: UDP ports setting in Node UI.
Do not worry if you are behind a CGNAT (like me) - it should work either way.
2. Enable network modules
While this may be optional, my node didn’t start working properly until I applied these kernel modules:
sudo modprobe tun
sudo modprobe wireguard
sudo modprobe ifb
sudo modprobe sch_netem
3. Have patience
The Mysterium dashboard is slow to update. If you fix a network issue, it can take up to an hour for the status to flip from “Monitoring Failed” to “Online.” Walk away, grab a coffee, and stop staring at it.
 Figure 2: Running node status.
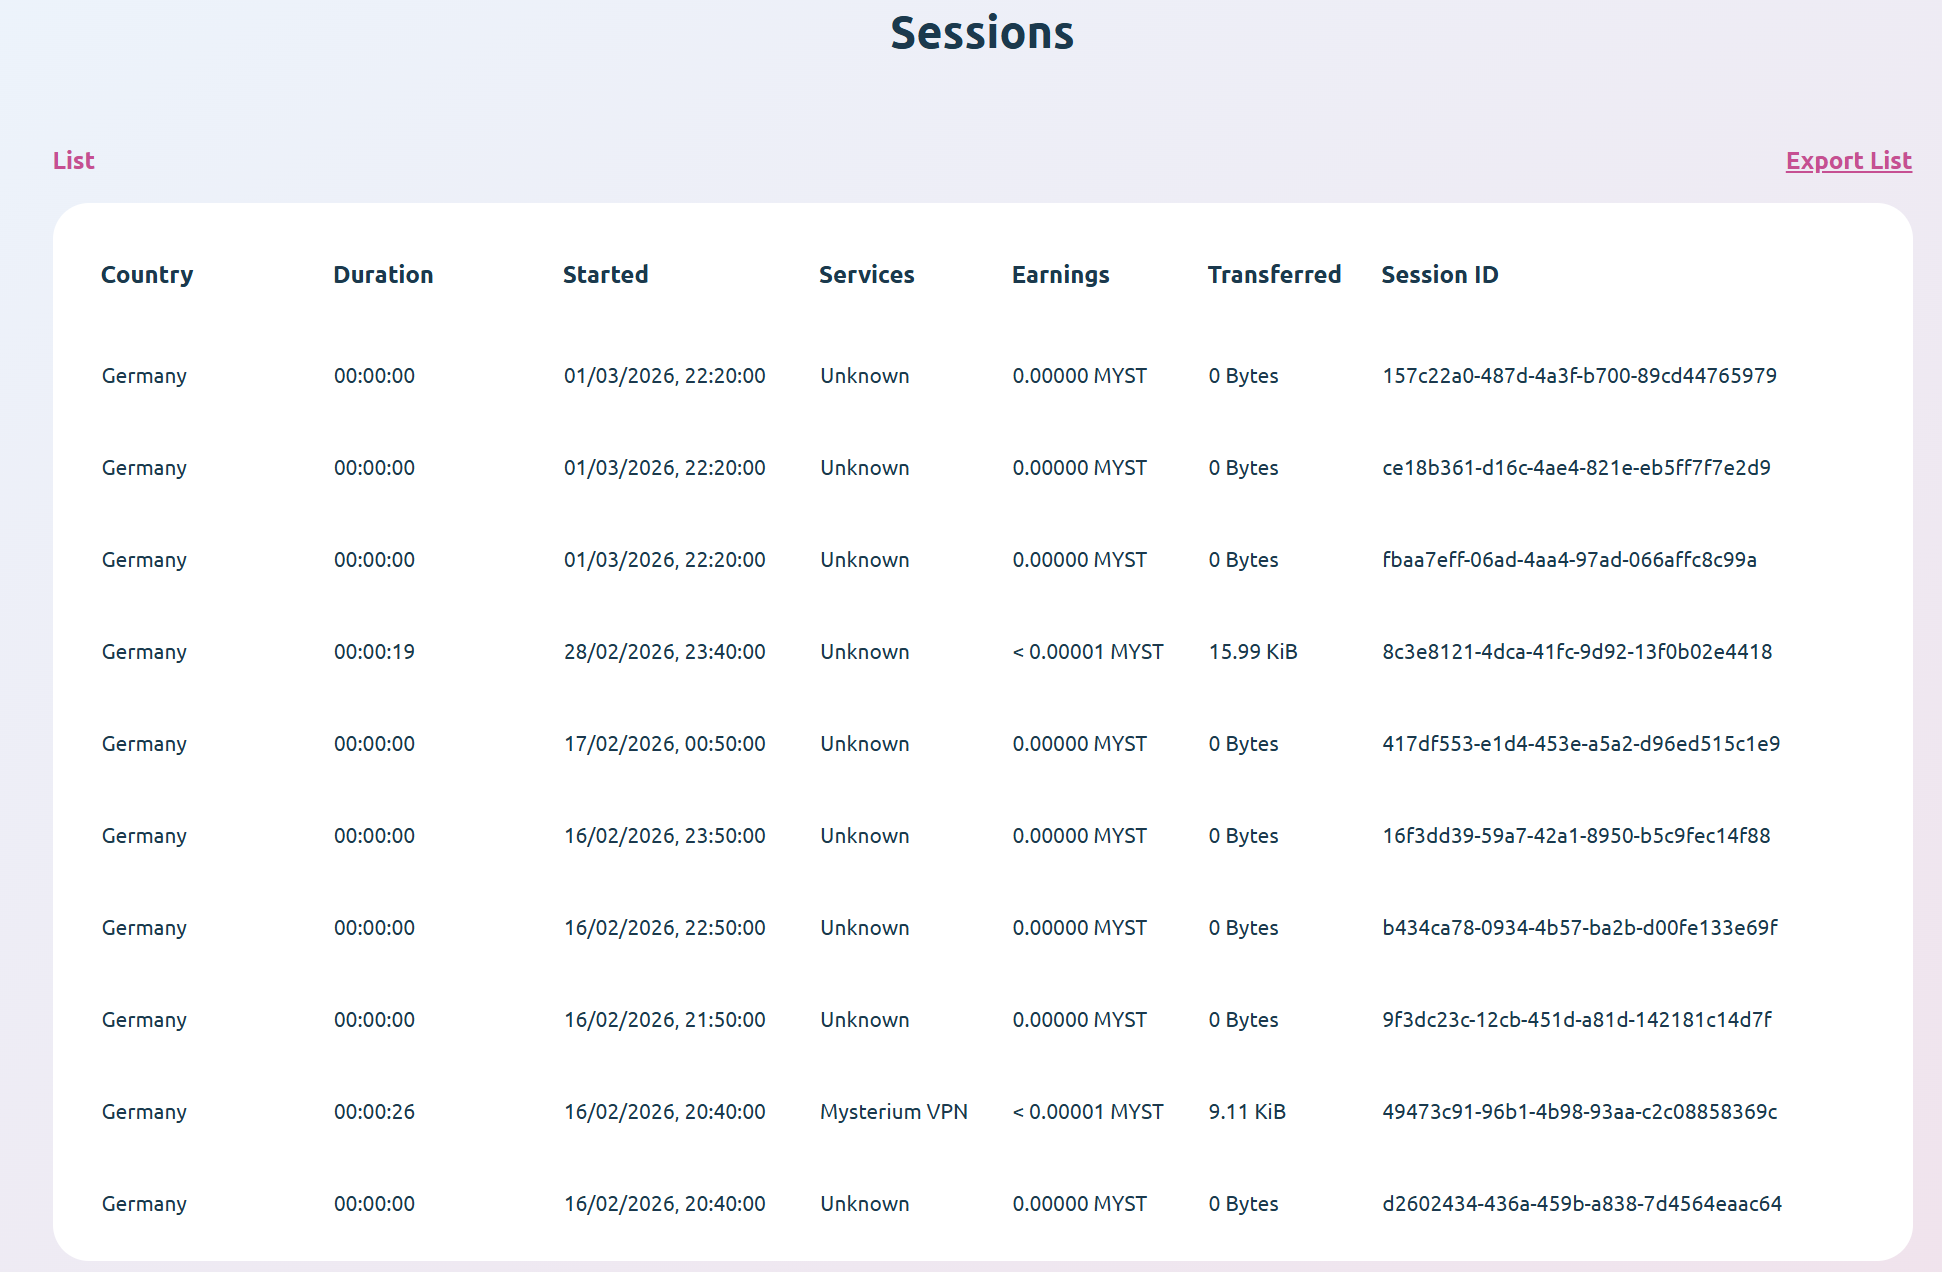 Figure 3: Proof of incoming connections.
The Verdict
Can you run a Mysterium Node on an original Raspberry Pi Zero? Sure. Will it make you rich? Absolutely not. Because of the CPU bottleneck, you will max out at around 5-10 Mbps throughput. You won’t get heavy Netflix streaming traffic, but you will reliably catch lightweight B2B traffic and web scraping tasks.
You can create a systemd service to start the program automatically at boot, which is what I did, but I’m leaving this for the reader as homework.
Once again, thank you for reading this blog post. I have added a comments section to the page in case someone who stumbles on my page would like to leave one.
Cheers,
Robert
